How to Update Signature in Outlook

November 13, 2025

With how advanced email platforms have become, users can set up an array of features that make using the software easier and tailored to their needs. In addition to sending standard emails and forwarding incoming messages, users can also archive, create folders, and set permissions to organize and filter their communications so they can access them at any time. Email platforms are also beneficial for businesses to communicate with customers and clients professionally, allowing them to manage and maintain these messages in one place. Having a designated email address is also essential in today’s world, since it’s the primary way people communicate.
Another way that emails can be used professionally is by including an official email signature. These signatures appear at the bottom of an email and indicate who the message is coming from, which is important in business settings. Using an email signature is also key when wanting to include specific titles and information that all recipients can view at any time, such as a corporate job title, work or business contact information, hyperlinks that can redirect users to a business’ or company’s official website, or any logos or images that represent said business as well.
Email software such as Microsoft Outlook allows users to add, edit, and update email signatures to their communications. The platform also makes it easy to do so, so that users can start using this feature at their convenience. With an email signature in place, Microsoft Outlook users’ created signature will then appear at the end of all communications they send out after setting up the feature. In minutes, you can add and update your email signature in Outlook by following the steps below:
Step 1: Log Into Your Email and Go to Your Account Settings
To update this setting, you first need to log in to your Outlook account using your email and password. After signing in, navigate to your account’s settings tab, located at the top right of your account’s homescreen, between your Microsoft account’s initials or profile picture and your email notifications icon. From there, select the settings tab, which looks like a widget, to display all your settings on-screen.
![]()
Step 2: Locate Your Account’s Signature Tab
Then, you’ll want to locate your account’s signature tab, which can be found by clicking on ‘Account’ then ‘Signatures.’ On Outlook’s settings homepage, Microsoft acknowledges that this tab was moved to this location from the general account settings section. After selecting ‘Account’ then ‘Signatures,’ the designated signature screen will appear so that you can add and update your signature.

Step 3: Update Your Email Signature’s Name and Details
With your email signature setting on-screen, you can now add and update it. To add a new signature, select ‘New Signature’ and enter the name that you want to appear for your email signature in the first textbox. In most cases, this will be your first and last name. In the second textbox, you can add your first and last name again and any additional information you want recipients to see as part of your signature.
Outlook allows users to add hyperlink text, insert images, change the font size and style of signatures, and bold, underline, or italicize text. Users can also use the program’s highlight and font color features to change the color of any highlighted text. Outlook also has features tabs that can be used to add bullet points, numbered lists, increase or decrease text indentation, insert quotations, and align text to the left, right, or center of the signature section. As part of its advanced email signature features, users can also add superscript or subscripted text, text strikethroughs, add a table graph, and more.

Adding hyperlink text that links to your business’ or company’s website is helpful for recipients who may want to learn more about the organization you represent. If you’re a person who also expects frequent contact from others via phone, you can add your business, personal, or fax number at the end of your email’s signature name, depending on how you see fit. You can also bold, italicize, underline, or highlight specific text that appears prominent to recipients, such as in cases where it includes information they should know. If you’re a business owner or a part of a company, it’s also helpful to add its logo so that recipients know that you represent it, and it can add a nice touch to how your signature initially appears to others.
Email Signature Quick Tips
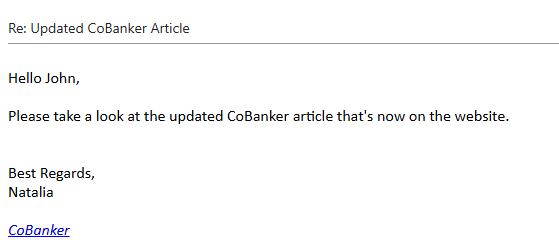
With your email signature saved, it’ll now appear in your communications. With Outlook’s email signature feature, you can update your signature at any time by navigating back to the specific settings tab outlined above, so that you can make changes to it at any time. In business, using your first and last name as part of your signature is essential, especially in business settings. That way, the people you’re communicating with can know who the emails are coming from, which can add to your professionalism.
The same applies to hyperlinking to your business’ website or the website of the company you represent. It’s also important to periodically check that your signature appears at the end of your emails to recipients. You can verify this by sending yourself a test email and confirming that it’s there. Microsoft also allows users to create and select default email signatures for new messages, as well as for forwarded and reply-to emails.
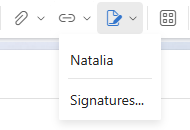
These settings can be configured in the same email signatures update tab by adding, updating, and selecting the signature you want to appear for these messages. You can also manually create a new email signature or add an existing one to a new email draft by selecting the ‘Signatures’ icon, which looks like a pen and paper, located next to the hyperlink paperclip icon feature, and selecting the signature that you want to use.
Take a look at our news on Business Technology